How to make a star ceiling
Create your dream star ceiling with our easy DIY fibre optic lighting kit!
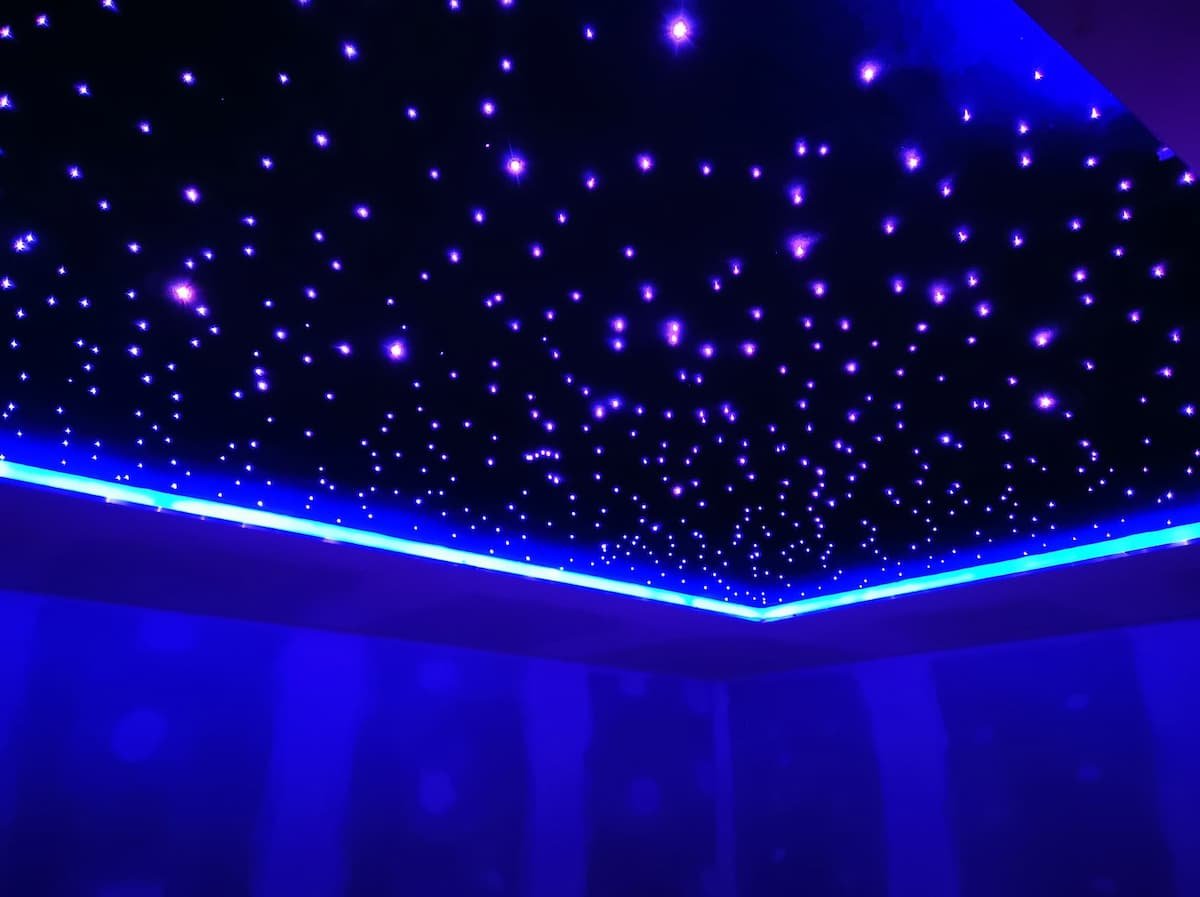
If you want to know how to make a star ceiling to create the night sky in your home, you’re in the right place. A fibre optic lighting kit from Stellar Lighting will make the process of embarking on a fun and exciting DIY star ceiling project easy.
Do you dream of turning your living room, bedroom, or home theatre into a breathtaking starlit oasis? Our DIY fibre optic lighting kits make creating your own celestial masterpiece easier than ever before.
In this step-by-step guide, we are going to explain everything you need to know to prepare, build, install, and enjoy a stunning fibre optic star ceiling in your living room, bedroom, home theatre, or anywhere else you’ve got planned.
Step 8: Secure the fibres
Step 9: Tidy up Time
Step 10: Secure the board
Step 11: Cover the screws
Step 12: Cut the fibres
Step 13: Finish - Turn on the lights
Discover the magic of a DIY star ceiling
Unleash your creativity and transform any room in your home or business into a mesmerising starry night with our DIY fibre optic star ceiling kit. Here's what makes it so special:
Easy to install: Our kit comes with everything you need to get started, and our step-by-step guide makes the installation process a breeze. No need to hire a professional; you can do it yourself!
Elevate your home design: Create an enchanting ambiance and elevate your home design to new heights with our stunning star ceiling. It's a unique and captivating addition that will leave your guests in awe.
Safe and reliable: Rest assured, our DIY fibre optic lighting kit is designed with safety in mind. Just follow the simple instructions, and you'll have a safe and beautiful star ceiling in no time.
Endless customisation: With our kit, you have the freedom to customise your star ceiling exactly as you envision it. Create realistic constellations, twinkling starry sky lights, shooting star effect, space lighting or anything else you can imagine.
Versatility: Whether you want to create a starlit bedroom, a magical home theatre, or a dreamy home office, our DIY kit can bring the stars to any space.
Introduction to DIY Fibre Optic Star Ceiling
The first point we’re going to cover in this guide about how to make a star ceiling is your pre-project preparation. Although the installation of the star ceiling itself isn’t overly complicated, it can be a little time-consuming. As such, make sure you read everything in this post so that you have a comprehensive understanding of the things you need to buy, prepare, and do.
How to make a star ceiling - Getting started
When you install your DIY star ceiling kit, this task will involve working at height. A safe system of work should be established and maintained to prevent injury. It’s essential you consider the potential risks and dangers of the work, along with the steps you should take to avoid them.
Personal protective equipment is also another key consideration. Being equipped with suitable and sufficient personal protective equipment, such as eye protection, face mask, protective overalls, safety footwear, and gloves, is vital. Your workspace should also be adequately illuminated.
Electrical Work Safety Advice and Tips
In terms of the room that you want to install your DIY starlight ceiling in, you will need to ensure it has an available 230 V lighting circuit with a suitable wall switch. We recommend that the lighting circuits from the consumer unit or distribution board are comprised of twin and earth PVC insulated cables with a minimum conductor size of 1.5 mm2.
An appropriate protective device, such as a fuse or miniature circuit breaker, should be installed at the consumer unit. We recommend a 6 A type B MCB for this purpose. If the supply circuit to the ceiling panel is not dedicated, your electrician can advise on protection arrangements. Before undertaking any electrical connection work, ensure the circuit is isolated at the consumer unit by turning off the MCB and, if practicable, locking it in the OFF position.
How to make a starlight ceiling - What you'll need
If you’ve ordered a fibre optic DIY star ceiling kit online from Stellar Lighting, here’s what you’ll get included in the box.
Light Engine (with power supply, remote controller, and user manual)
Fibre Optic Bundle (with port connector)
Drill Bits (optional)
Tools Required for the Installation
Cordless Drill
Epoxy Glue
Side Cutters
Scissors
Drill Bit (which is an optional part of the starlight kit)
In our ‘how to make a star ceiling guide’, we have used the following list of equipment:
9mm MDF board
Black paint or Black Molton Fabric Flame Retardant
No Nonsense Contact Adhesive Spray
Black Solvent-Free Silicone or epoxy glue
Black Cloth Tape
Black Felt Self Adhesive Dots - to cover screws
Aluminium Tape/Electrical Tape
Electric Drill
Three different colour marker pens
Wire Cutters / Scissors / Nail clippers
How to make your own star ceiling - Step by step guide
Whether this is your first attempt to install a DIY fibre optic star ceiling, or you’ve already done this before, our step-by-step guide combined with our star lighting kit is all that you need to make your project a success.
Follow these exact instructions on how to make a fibre optic star ceiling home theatre, ceiling star lights for bedroom, or hobby project will be a success!
Step 1: Check your items
Once you receive your light engine and optical fibre, make sure you test the fibre optic star ceiling kit to ensure it works as expected. If you identify any damage to the product, do not install or test it out before consulting with us first. Please note that the remote controller comes without a battery.
Step 2: Prepare the ceiling space
If you are using large or multiple boards as your star ceiling panel, then make sure you reinforce them with timber (or other suitable materials) on the edges and in the middle. We recommend that you securely place the board on work-stands. This is so that you can easily work on the back of the panel while being able to pull the fibres through from the bottom (visible) side.
If you do not have the right access to ceiling space, then you can create a frame that is big enough to house the panel. It will need to be deep enough to house the light engine comfortably. If you do this, then you will need to fit the fibre optic tails into the board will take place before securing the board to the frame.
Step 3: Prepare the visible side of your board
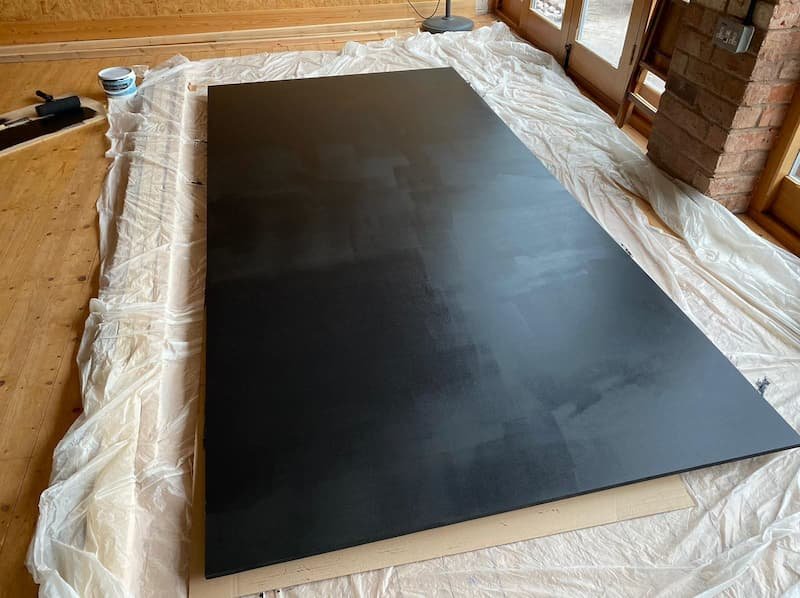
You can either paint your board or use fabric to cover it. Neither option is better than the other; it’s down to your own personal preference.
If using paint, then make sure you apply at least two or three layers to ensure a smooth finish.
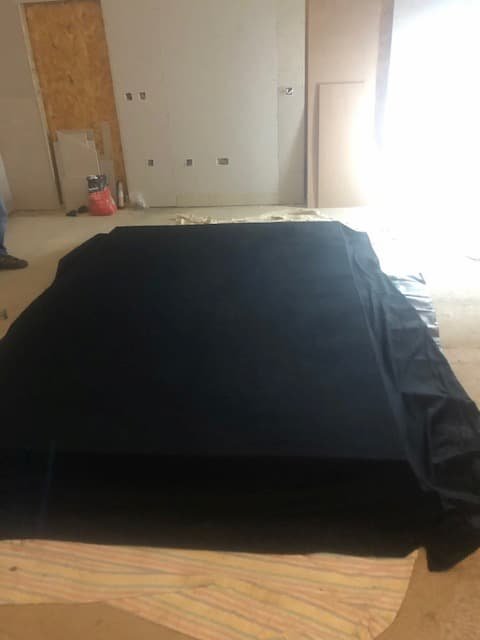
If using fabric, firstly, spray the adhesive over the visible side of the board and attach the fabric. Work out any bubbles or creases with your hands or a roller, then secure them on the backside of the board with more adhesive spray. If you’re covering the board with black fabric, then you’ll need to ensure you are working off the ground or in a clean workspace when attaching the fabric to the board. Otherwise, you will end up getting dust and sawdust on part of the fabric; and this is time-consuming to remove.
Step 4: Mark your star points
Calculate how many star points you will have per square meter on your board and how many of each diameter (if you have a mixed diameter kit). We usually recommend 50 - 100 fibres per square meter so you should choose your star ceiling kit accordingly.
Also, consider the location of your light engine, both in relation to the furthest star points and the number of fibres per length you have in your bundle (If your fibre bundle consists of fibres with various lengths). The light engine should be placed in a dry, well-ventilated, accessible location.
Using three different colour marker pens, draw circles or crosses on the backside of the board to help you plot out where you will drill the holes for the star points to be. The number of marks you make should correspond to the number of tails in your fibre optic bundle. The three colours represent the three different diameter fibres in your mixed diameter bundle (0.75 mm, 1 mm, and 1.5 mm).
If you are looking to achieve a “night sky” effect, make the marks random but spread across the whole surface of the board. Some areas can be denser than others, just like the natural stars at night in the sky. Alternatively, draw a pattern or replicate constellations of your choice. Remember to draw the mirror image of what you want to see from below.
Step 5: Drill the holes
Using the 1.5mm drill bit, you need to drill through your pre-plotted largest star points from the backside through to the visible side of the board. Do the same for the 1mm, and then the 0.75mm fibres.
Please note that we only provide 1mm and 1.5mm drill bits; this is because the 1mm drill bits are suitable for both the 0.75mm and the 1mm diameter fibres. We recommend using a drill chuck extension to hold the smaller drill bits in place. Alternatively, you can use a combination of electrical and aluminium tape around the base of the drill bit to hold it in place.
These drill bits are fragile, so be careful while using them.
Step 6: Identify the optical fibre bundle's starting point
Once you are happy with the placement of the holes, you need to decide where the light engine will be placed above the ceiling and then mark where it will go on the board. Place the fibre optic bundle from your kit on that mark on the board.
When you decide on the light engine’s location, consider the following factors:
The light engines should always be placed in a dry location to avoid short circuits and prolong their lifetime.
It should also be accessible in the future in case of technical issues or if you should wish to change the light engine.
The distance of the light engine’s connector ports to the furthest star points on the board.
The electrical connection for the light engine.
Step 7: Insert the fibre optic tails in the drilled holes
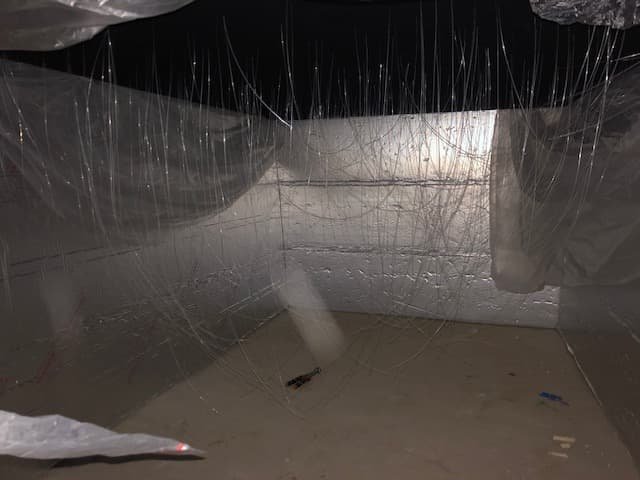
Starting with the shortest fibres first, take out the largest diameter first and thread them through the largest holes drilled nearest to the light engine mark made earlier. Pull them through from the underside, or if access is a problem, thread them through as far as they can go, so the cables are fairly neat.
When pulling through the fibres, ensure they are not too tense and that they do not have sharp bends or breaks as this would reduce the light intensity at the fibres’ endpoints. Continue this process with the 1mm and 0.75mm fibres, and then move on to the next length fibres and repeat until all the fibres have been thread through the pre-drawn holes.
Step 8: Secure the fibres
Using the black silicone or epoxy glue, secure the fibres by putting a dot on each of the hole points and leave it to dry. This will stop the fibre optics from falling back through the holes when you secure it to the ceiling. Again, ensure the fibres are not too tense and that they do not have sharp bends or breaks.
Step 9: Tidy up time!
We’re almost done! However, these final stages are essential if you want to make sure everything looks exactly how it should. With all the time and effort that you’ve invested learning how to make starry night ceilings, it’s important you do a thorough job on the tidy-up aspects.
The back of the board
Once the glue has dried, neaten up any unruly fibre cables and tape down using the black cloth tape. This step just helps flatten down some of the cables even more and stops them from getting tangled. Make sure the fibres don’t break during this process.
The visible side of the board
If you have easy access to the visible side of the board, cut the fibres to a more manageable length. For example, 10-15cm of each wire hanging through.
Step 10: Secure the board
This step depends greatly on your individual scenario, whether you’re using an installation frame or a recess on your ceiling and whether you have access to the ceiling area from above. You will have to make sure that the light engine is connected to the optical fibre bundle’s connector port when the board is lifted and secured into its final position.
Depending on the size of the board, you might need 2-4 people to help you. Plasterboard props are a great help to hold the board in place whilst you secure the panel to the frame or joists.
Step 11: Cover the screws
You can cover the screws with black felt self-adhesive dots as they will not be noticeable amongst the black fabric. If you’ve painted the board to a specific colour, paint the dots with the same colour prior to applying them over the screws. This may seem like a minor point, but where the aesthetics are concerned, it will make a huge difference and should not be overlooked.
Step 12: Cut the fibres
Using wire cutters or nail clippers, cut the remaining length of the wires down to your desired length. If your panel is covered with fabric, then make sure you do not cut them completely flush, as the fabric can cover the end of the fibres. Leaving the fibres a little bit longer creates a halo effect around each fibre, and it looks really good. Test the effect as you cut shorter and stop at your desired length. You can get a more interesting night sky effect by cutting the fibres at a variety of angles.
If you plan to paint your ceiling or board after the panel is fitted, leave 5-10cm of fibre hanging out until you finish painting. Then, you can cut them short, as the light is only emitted at the end of the fibres.
Step 13: Finish - Turn on the lights
Your panel is now ready, and you can enjoy the beautiful night sky that you have lovingly created yourself. You can scroll through the light engine’s programmes with the remote controller and set the panel to your desired mood. If the light engine you’ve purchased is Bluetooth app-enabled, don’t forget to set that one up too. Sit back, relax, and enjoy your stunning star ceiling masterpiece!
How to make a starry night sky ceiling - Questions
At this point, you’ve probably got a lot of questions to ask. Although we’ve covered most of the practicalities in this step-by-step guide to DIY fibre optic star ceilings, the below questions directly answer some of the key points that may determine how or when you decide to start your project.
Q: Where can you install a fibre optic star ceiling kit?
A: As the light source is going to sit above the ceiling, and the fibre optic tails pass through the ceiling in order to create the stunning star points, you will either need access to the area above the ceiling (the loft area or sufficient space in a ceiling void). Alternatively, you can create a special housing or recess for the board that will accommodate the light engine and optical fibres. Another option we discuss in this post is to create a frame; lots of people do this when they don’t have the above-mentioned access. If you use a board, it can be made from a range of materials:
Plasterboard
Acrylic Sheets – Perspex or Plexiglas
PVC
Dibond
Wooden Boards – MDF or HDF
Stretch Ceilings
In this guide, we’ve focused on giving you instructions for creating a DIY starry ceiling using an MDF Board to accommodate the optical fibres. However, the steps we outline can be easily adapted to suit other installation methods.
Q: Which starlight kit should I choose from your product range?
A: We usually recommend 50-100 fibres per square meter, so calculating the starlight ceiling area is a good starting point. On our fibre optic star ceiling page, the light engines are split into small/medium/large projects to help with your decision. In some cases, we sell the light engines bundled with the optical fibres, however, for most products, you’ll be able to choose from a wider variety of compatible bundles and will need to add them separately to your shopping basket.
Our Light engine summary table allows you to compare the light engines by features and maximum bundle capacity, while the Fibre optic bundle summary table shows you the available bundle options with details on fibre count, diameter and length.
Q: Will I need to hire an electrician to install it?
A: This will largely depend on where you are planning to install your fibre optic star ceiling kit. It’s important to consider the electrical connection of the light engine as this might require the involvement of a trained and competent person. Our light engines come with a three-pin UK plug.
Q: How long does it take to install a fibre optic star ceiling kit?
A: The approximate amount of time you will need to install a 3 square meter panel with around 200 fibre optic tails is roughly between 8-9 hours. This includes the time allowed for the construction of the frame and the plasterboard panel. It also accounts for the drilling of the holes and the installation of the fibre optic tails, the latter taking around 1.5 hours in total.
Q: Can you prepare two independent panels with one kit?
A: Yes, it is possible to prepare two panels independently. If you’re using one optical fibre bundle, you can either work on the two panels at the same time if you have sufficient space. Alternatively, you can remove the port connector from the end of the fibre bundle, split the bundle up and once ready, re-attach the bundle connector.
However, your best option is to use a light engine with dual ports, such as the LEK-432 APP or LEK-432 DMX models. This is because a single light engine can be connected to two optical fibre bundles.
Q: Do I need to be able to access the light engine after it’s been installed?
A: Yes, you should plan your starlight ceiling in a way that you can access the light engine for maintenance purposes, in case you need to replace a part, change the twinkle wheel (for specific models).
Q: What temperature can the DIY star ceiling lights kit withstand?
A: The operating temperature range for the fibre optic star ceiling kit is 0°C - 40° C.
Q: Can I install the star ceiling kit in bathrooms, steam rooms or saunas?
A: Yes, you can, as the optical fibres don’t contain electrical parts. However, the light engine needs to be kept away from moisture, water and temperature above 40° C. Please ensure that the light engine has sufficient ventilation and is not placed in a completely sealed area.
Q: I don’t have time, the skills or the tools to make my own starlight ceiling. Can you make it for me?
A: We do have a range of ready-made starlight ceiling panels in our product range. You can choose from fibre-optic ceiling panels or LED star ceiling panels that are easier to install.
Ceiling star lights - Important safety guidance
Please do take care while working at a height by carrying the tasks out in a safe manner. At least two people are required for the installation; for larger panels, you may need additional help. Star kits should only be installed on dry and smooth surfaces. Wet surfaces (including fresh paint) contain moisture that could short circuit the light engine.
Electrical work should only be performed by trained and competent persons with sufficient skills and knowledge to avoid danger. If in any doubt, we recommend engaging the services of an approved electrician.
The cooling holes of the light casing should not be covered while in operation.
The light engine should be placed in a dry, well-ventilated, and accessible location.
Opening or damaging the case of the light engine will void the warranty.
We do not take responsibility for any damage caused by improper installation.
If you have any questions, problems, or comments regarding the installation or the operation of your starlight kit, please contact us at info@stellarlighting.co.uk. Once you’ve completed your DIY star ceiling, we’d love to see a picture! We look forward to seeing your finished projects online soon.
Contact us for free professional advice
Our team of experts is here to guide you every step of the way in creating your perfect star ceiling. Whether you have questions about installation, design ideas, or product selection, we're dedicated to helping you achieve the starlit paradise of your dreams. Reach out to us today and let's turn your vision into a reality!
Make your home sparkle with Stellar Lighting's DIY fibre optic star ceiling kit!


